Painting your bathroom ceiling may not be the most glamorous home improvement project, but it is one of the most important when it comes to keeping your space fresh and clean. Because bathrooms are exposed to high levels of moisture, humidity, and frequent temperature changes, ceiling paint in this room requires special attention. Done incorrectly, you may end up with streaks, peeling paint, or even mold growth. Done properly, it can brighten your bathroom, improve air quality, and add years to your ceiling’s durability.
In this article, we’ll explore the best bathroom ceiling paint choices, share professional techniques, and provide step-by-step painting bathroom tips to ensure your project goes smoothly and without mess. Whether you are a DIY enthusiast or hiring professional help, these insights will help you achieve a clean, polished finish.
Why Bathroom Ceilings Need Special Care
Unlike other rooms, bathrooms are prone to high humidity and condensation, particularly after hot showers. This makes the ceiling more vulnerable to mold and flaking paint. That’s why selecting the right moisture-resistant paint is crucial—it prevents damage and keeps your bathroom looking fresh.
Additionally, ceilings are often overlooked compared to walls, yet they significantly affect how bright and clean your bathroom feels. A newly painted ceiling can make the space feel larger, lighter, and more inviting.
Choosing the Right Bathroom Ceiling Paint
Before you pick up a roller or brush, you need to choose the right paint. Using the wrong product could mean redoing the job sooner than expected.
1. Moisture-Resistant Paint
Bathrooms require paint that can withstand humidity and condensation. Look for high-quality moisture-resistant paint specifically formulated for kitchens and bathrooms. These paints contain additives that resist mold and mildew, keeping your ceiling looking pristine.
2. Finish Options
Flat finishes are common for ceilings, but in bathrooms, a satin or semi-gloss finish is often recommended. These finishes are easier to clean and provide added protection against moisture.
3. Color Selection
White or light shades are the most popular choices for bathroom ceilings as they reflect light and make the space feel more open. However, you can experiment with soft pastels or light grey for a modern touch.
4. Eco-Friendly Choices
If you’re sensitive to fumes, consider low-VOC (volatile organic compounds) or zero-VOC paints. These are safer for indoor use and contribute to better air quality.
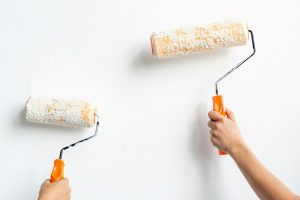
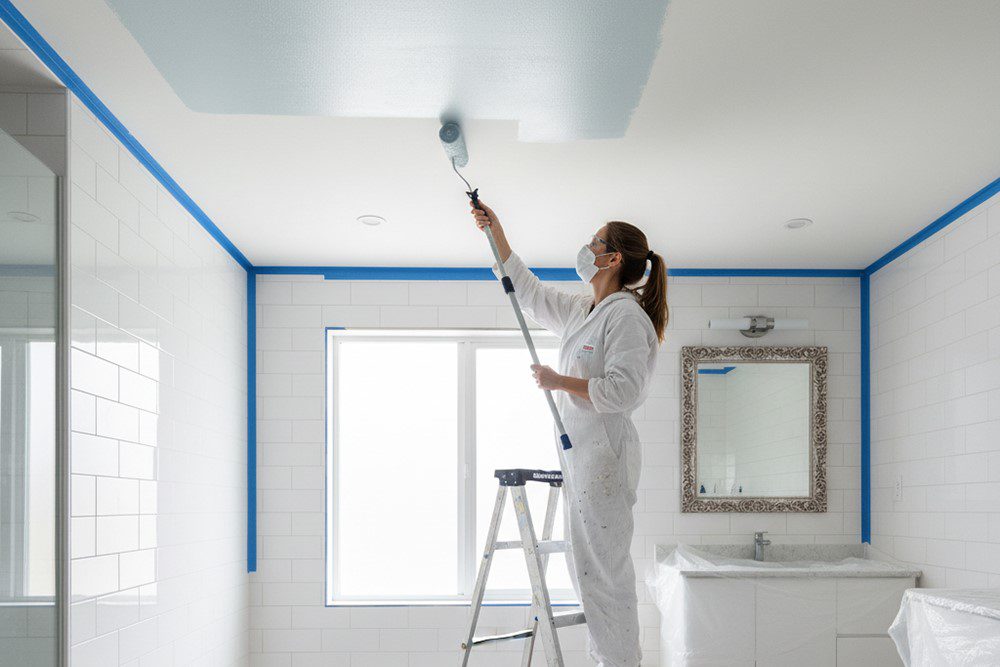
Essential Tools for the Job
Having the right tools is just as important as choosing the correct paint. For a clean, mess-free project, you’ll need:
- A sturdy step ladder
- Painter’s tape
- Drop cloths or plastic sheeting
- A paint tray and liner
- High-quality roller with extension pole
- Angled brush for edges and corners
- Protective eyewear and gloves
Investing in good tools not only makes the job easier but also ensures a smoother finish.
Preparing the Bathroom for Ceiling Painting
Preparation is the key to success. Before applying bathroom ceiling paint, follow these steps:
- Clear the Area – Remove any freestanding furniture, toiletries, and rugs. Cover the vanity, shower, and toilet with drop cloths or plastic.
- Ventilation – Turn on the bathroom fan or open windows to ensure good airflow while painting.
- Clean the Ceiling – Wash the ceiling with a mild detergent solution to remove dust, grease, and mildew. Let it dry completely.
- Repair Damage – Patch any cracks, dents, or peeling areas with spackle. Sand smooth once dry.
- Prime the Surface – Use a stain-blocking primer, especially if there are water stains or mold spots. This ensures the new paint adheres well and provides a uniform finish.
Proper preparation is one of the most overlooked but valuable painting bathroom tips. It prevents streaks, peeling, and uneven coverage later.
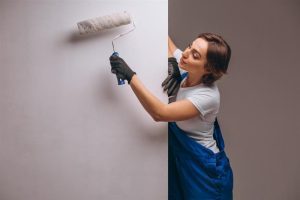
Step-by-Step Guide to Painting Your Bathroom Ceiling
Now that your bathroom is prepped, it’s time to get painting. Follow this method for the best results:
Step 1: Tape and Protect
Apply painter’s tape along the edges of the ceiling, light fixtures, and ventilation fans. This prevents accidental smudges and ensures sharp lines.
Step 2: Cut In the Edges
Using an angled brush, cut in around the ceiling’s edges. Take your time and work in small sections to maintain control.
Step 3: Load the Roller Properly
Dip your roller into the tray, ensuring it’s evenly coated without dripping. Overloading the roller is one of the main causes of mess and drips.
Step 4: Apply the Paint
Start in one corner and work across in straight, overlapping strokes. Use light pressure to avoid roller marks. For a bathroom ceiling, two thin coats of bathroom ceiling paint are generally better than one thick coat.
Step 5: Maintain Ventilation
Between coats, allow the ceiling to dry fully. Keep the fan running to reduce humidity and help the paint cure properly.
Step 6: Remove Tape Carefully
After the final coat dries, gently remove painter’s tape while the paint is slightly tacky to avoid peeling.
Avoiding Mess and Drips
Ceiling painting can get messy if not done correctly. Here are a few techniques to keep things clean:
- Use a roller with an extension pole instead of standing on a ladder for better control.
- Apply thin coats rather than overloading with paint.
- Keep a damp cloth handy to wipe away accidental drips immediately.
- Wear protective eyewear to avoid paint splatter.
These small adjustments make ceiling painting Canada projects far more manageable and professional-looking.
Drying and Aftercare
Once your ceiling is painted, allow it to dry thoroughly before taking hot showers in the bathroom. Excess humidity during the curing process can cause streaking or uneven finishes.
For long-lasting results, ensure proper ventilation in your bathroom going forward. Use the exhaust fan during and after showers, and consider installing a dehumidifier in bathrooms with poor airflow. Regular cleaning with mild solutions will also keep mold and mildew at bay.
Professional vs. DIY Bathroom Ceiling Painting
While many homeowners take on ceiling painting as a DIY project, hiring professionals can be worthwhile if you’re short on time or worried about mistakes. Professionals are experienced in handling bathroom ceiling paint and know how to manage tricky conditions like high humidity, sloped ceilings, or textured finishes.
If you’re confident with DIY projects, following the preparation and painting steps outlined above will help you achieve excellent results. For larger or more complex bathrooms, a professional touch might be worth the investment.
Ceiling Painting in Canada: Regional Considerations
In Canada, where seasonal temperature changes are extreme, bathrooms experience even more stress from condensation and fluctuating humidity levels. Choosing ceiling painting Canada products that are specifically formulated for cold climates can extend the life of your ceiling.
Canadian hardware stores often carry paints labeled as “bath & kitchen” varieties, which are tailored for durability and mold resistance. Pairing these with proper ventilation ensures your bathroom ceiling remains in great condition year-round.
Final Thoughts
Painting a bathroom ceiling doesn’t have to be messy or overwhelming. With the right preparation, tools, and high-quality moisture-resistant paint, you can achieve a smooth, durable finish that brightens your space. From careful preparation to thoughtful aftercare, these painting bathroom tips ensure a professional look even if you’re tackling the project yourself.
For homeowners in Canada, understanding local conditions and using products designed for bathroom environments is especially important. Whether you do it yourself or hire professionals, the key is to invest in proper bathroom ceiling paint and techniques that prevent peeling, mold, and mess.
By following these steps, your ceiling will not only look beautiful but also withstand the test of time in one of the most demanding rooms of your home.
FAQ’s
Q1. How do you paint a bathroom ceiling without drips?
A: Apply thin coats with a properly loaded roller, use an extension pole for control, and keep a damp cloth nearby to clean accidental drips immediately.
Q2. What type of paint is best for a bathroom ceiling?
A: The best choice is moisture-resistant paint designed specifically for kitchens and bathrooms. These paints resist mold, mildew, and peeling caused by high humidity.
Q3. Can I use regular interior paint in a bathroom?
A: Regular interior paint is not recommended. Bathrooms require moisture-resistant paint formulated to handle steam, condensation, and cleaning without deteriorating.